Feeds:
Posts
Comments

Half aprons…

Half aprons seem to be what all the teacher’s are wearing these days…at least they are at my SIL’s school!  I made one for her and a couple to possibly sell to some of her co-workers.

(click image to enlarge)

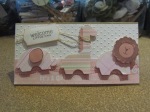
The one on the left is for my SIL…her classroom mascot is penguins…Poon’s Penguins!  The one on the right is up for grabs.  Apparently I didn’t get a photo of the third one…it was cute fabric too.

I didn’t have a pattern.  I got basic dimensions from some I saw online and made up my own pattern and instructions.  Mine ended up being several inches bigger than those I saw…wanted to make sure there was plenty of room to hold things in the pockets.  I was able to make both of these in a couple hours.  Not too bad for making it up as you go along!

There are two rows of pockets, each row has three pockets.  Lots of room for keys, phone, pens/pencils and anything else a teacher needs to carry.

So, what do you think?

Thanks for stopping by!

Charmaine


Also linked at Sarah Hamer Designs Link Up Tuesday

My sisters birthday was a couple weeks ago.  I made her a card and stuck a gift card inside.

(click image to enlarge)

I used the same method as I used on the hydrangeas…inking with distress markers and spritzing with water.  I inked the edges of the image piece and I also added some glitter to the sunflower using a stardust jelly roll pen.  I embossed the sentiment with white embossing powder and added a little silk ribbon to finish it off.

Pretty simple card…no frills.

So, what do you think?

Thanks for stopping by!

Charmaine

Adrienne’s birthday…

A friend of ours had a birthday a few days before mine.  I made her a card from one of the hydrangea’s I inked up for my birthday thank you’s.

(click image to enlarge)

I also made her a small set of cards as a gift, using the same technique, just with a different stamp.


I believe the cherry blossom stamp is from Hero Arts.  The tag die cut and sentiments are from PTI.

So, what do you think?

Thanks for stopping by!

Charmaine

My birthday was a few weeks ago.  So I made some thank you cards for the presents I received.  I found a great tutorial from Taylor VanBruggen using distress markers.

(click image to enlarge)


I used the technique Taylor did except I spritzed with water.  I’m not sure if there’s something in the Ink Potion #9 that works better, but when I spritzed with water it muddled the image when I stamped it.  I got better results when I stamped the image a second time without spritzing again.  Maybe I was spraying too much water on there.  I’ll have to get some Ink Potion #9 and try it out.

Instead of die cutting the stem, I stamped it and then added the leaves, stamping it the same way I did the blooms.  I also used this same hydrangea image for a birthday card…I’ll show you that another time.

So, what do you think?

Thanks for stopping by!

Charmaine

The Dreamweaver team has a challenge each month.  This month it’s Getting Inky with Dreamweaver…you can find the details at the Dream it Up blog.

I’ve been hosting Thanksgiving for the past few years and make invites for everyone.  So I thought I’d start getting some ideas together for this years invite…this pumpkin stencil from Dreamweaver was a great place to start!  You can find the stencil at the Stencil With Style website.

(click image to enlarge)

I cut my cardstock down to size first.  I then attached my stencil to the cardstock with some washi tape, spritzed it lightly with some rubbing alcohol and sent it through my cuttlebug to emboss.  After the alcohol dried I took my distress markers and colored everything in…I still had my stencil on.  I then rubbed the image, stencil still on, with my glue pad.  I removed the stencil and sprinkled it with Martha’s ultrafine glitter.  I rubbed the glitter in a little so that it stuck really well to the image.  You can’t see the sparkle real well in the photo, but it shimmers in real life.

I distressed the edges of the image piece as well as my layering piece and added some distress ink to the edges.  I mounted onto some kraft cardstock.  The sentiment is from PTI’s Autumn Acorns set…I die cut the leaf image from the matching dies and then stamped the sentiment.  I wrapped the leaf stem with some twine and attached with foam adhesive.

I think next time I’ll try sponging the ink on.  Using the markers seemed to add some harsh lines to the coloring…since I was doing it through the stencil.  Sponging would soften it up a bit.

So, what do you think?

Thanks for stopping by!

Charmaine

So the last of the baby projects…the card and packaging.  I actually made the card first…then used the idea to decorate the cover of the first year book you saw in last Monday’s post.

(click any image to enlarge)

I used my swiss dots embossing folder for the background of the card.  I added a strip of paper at the bottom and stitched some squiggly lines so it would look as if my animals were walking on a road.  I used the same PTI dies to cut out my animals.

For the packaging I just used a really big cello bag and put everything inside.

I must say that the gift was a huge hit!  The new mommy was excited about the book.  She said she wasn’t a scrapbooker, but thought the way I laid everything out would make it super easy for her to use and keep up with…bonus!

So, what do you think?

Thanks for stopping by!

Charmaine

As I mentioned the other day I made a baby’s first year book to go along with my sewn gifts.  There’s tons of photos below!  I got the idea for the book from Kelly.  I used her concept, but made it my own using different techniques.

(click any image to enlarge)

For the cover I made a “quilt”‘ using pieces of the same patterned paper I used throughout the book.  I added glassine bags to the front and back covers to add little mementos.  I added banner tags to a few of the pages so the new mommy will know my idea for that page…a picture of the new baby…a photo of the family etc.  Each page has a library pocket, inside each pocket are two journal cards.  The idea is to take a photo of the baby each month and then use the cards to write down anything new with the baby…first smile, first tooth, first word etc.

I used journal cards from Project Life.  I cut each in half and sent them through my printer to print out the text I wanted.  I did this by first laying out my text on my computer, printing a test page then taping the cards in place over the text and sending back through my printer.  I was then able to get the text in the exact spot I wanted it.  I alternated the pages for the photo and journaling and bound everything with my bind-it-all.  The dies used on the cover are from PTI and the punch I used for the tabs is from Stampin’ Up!

To make the tabs I laid everything out on my computer, spacing appropriately, printing and then punching.  I attached them using my tiny attacher.

Any questions?  I know there was a ton of stuff in this post, but I think most of it is pretty easy to figure out from the photos…if not…just give me a shout!

So, what do you think?

Thanks for stopping by!

Charmiane

Baby Shower…

Sorry for the absence…I took a little time off to spend with my honey.

I had a baby shower to go to at the end of last month.  So I set out to make some fun things.  Our friend had already found out she was having a girl so I chose some fun pink fabrics to make a few gifts.  I did a lot of searching online to get some ideas, which I did, making a few changes to make them my own.  Here are a couple links to the sites I went to…burp cloths, changing pad…I also made a bib, but can’t seem to find the link to that pattern.  When I do, I’ll be sure to link back.

I used the basic ideas and tutorials they had, changing sizes and embellishments a bit.

(click any image to enlarge)

I purchased my fabric from JoAnn’s…the burp cloths and bib were made from snuggle flannel.  The changing pad was made with snuggle flannel and some minky fabric…super soft.  As I mentioned I used the same basic ideas they used in the tutorial, I changed my sizes to be a little larger.  This helped in utilizing all of the fabric.

I also made a scrapbook for the baby’s first year.  I’ll show you this another day as I have TONS of photos for this one.

So, what do you think?

Thanks for stopping by!

Charmaine

Photobucket

My nephew graduated from college a couple weeks ago…the first grandchild in the family…so it was a big event for us.  I’ve already shown some of the things I made for the event…invites…party favors…guest jar.  Today I’ll show you the thank you cards I made for him to use for the gifts he would get…this was part of his present from me.

(click any image to enlarge)

Keeping with the survival/camouflage theme we had going for the party I used some camo paper and layered it onto some brown cardstock and a kraft base.  I stamped it with a PTI stamp from the Think Big series and embossed with white.  For the other cards I used the same stamp and again embossed with white.  I then masked over that and stamped on top of it with my wood grain background stamps from PTI using kraft ink, also from PTI.

I made some envelope wraps like I did for his mom’s birthday present I showed you last week.  His return address is on the back side.  I packaged it all up in a large glassine bag…sorry forgot to take a photo of this.

This is the card I gave him for his graduation…I used 3 different stamps on the front…just mounted them on my acrylic block and stamped multiple times with kraft ink…easy peasy.  I attached a strip of card stock on the inside of the card to hold some money.

So what do you think?

Thanks for stopping by!

Charmaine

My SIL’s birthday was a couple weeks ago…we combined her birthday party with my nephew’s graduation party…so she didn’t get her present til the week after.

For her birthday I got her a gift subscription to BirchBox.  I also made her a small set of note cards.

(click any image to enlarge)

I used a Dreamweaver stencil and embossing paste.  The photo on the left uses white paste and the ones on the right use a pearl paste.  The colors end up looking gray and silver since I put it over black card stock, but I think it turned out nice for my first try!

I created some envelope wraps using the same zebra theme to add to the set…now she can jazz up the envelopes as well!

I created these on full sheet sticker paper and cut them down.  On the back side I already have her return address printed so all she has to do is peel, stick and write the address on the front.

This is how I packaged everything up

If you have any questions on how I created anything, please feel free to contact me.

So what do you think?

Thanks for stopping by!

Charmaine


I Heart Nap Time